Smartphone camera techniques : Pro tips for amazing Shots in 2024.
Introduction:
Is it possible to capture great images with a smartphone?
The answer is yes, if you understand some basic smartphone camera techniques you can capture some stunning images. Picture this: you’re about to capture a breathtaking moment, and all you have is your smartphone. Guess what? That’s all you need! Did you know that in 2024 smartphones captured over 90% of all digital photos? That’s right – the best camera can be the one in your pocket. I’ve been there, fumbling with my phone, trying to snap that perfect shot. But fear not! Whether you’re an Instagram enthusiast or just want to document life’s precious moments, this guide will transform your smartphone into a powerful creative tool. Let’s dive into the world of pixel-perfect memories!
Understanding Your Smartphone Camera.
• Exploring native camera apps and their features
For this guide i will be focusing to two phone plat forms, Android through the Samsung s23 Ultra and the IPhone 14 max pro as these are the two phones i use when wanting to capture images on my phone when i do not have my DSLR on hand. Both phones are highly capable of taking some fantastic photos straight out of the camera. But with a little knowledge of how both phones work you can get out of automatic mode and create some stunning images. This guide is not about comparing images that each camera produce but more about how to get the best out of both platforms when it comes to photography with a smartphone.
The below table outlines the specifications of both phones.
Comparison of Cameras: Samsung Galaxy S23 Ultra vs. iPhone 14 Pro Max
| Specification | Samsung Galaxy S23 Ultra | iPhone 14 Pro Max |
|---|---|---|
| Rear Camera – Main Sensor | 200 MP, f/1.8, 24mm (wide), PDAF, Laser AF, OIS | 48 MP, f/1.8, 24mm (wide), Dual Pixel PDAF, sensor-shift OIS |
| Rear Camera – Ultra Wide | 12 MP, f/2.2, 13mm (ultrawide), Super Steady video | 12 MP, f/2.2, 13mm (ultrawide), Dual Pixel PDAF |
| Rear Camera – Telephoto | 10 MP, f/2.4, 70mm (telephoto), PDAF, OIS, 3x optical zoom | 12 MP, f/2.8, 77mm (telephoto), PDAF, OIS, 3x optical zoom |
| Rear Camera – Telephoto 2 | 10 MP, f/4.9, 230mm (periscope telephoto), PDAF, OIS, 10x optical zoom | N/A |
| Rear Camera – Depth/VGA | N/A | TOF 3D LiDAR scanner (depth) |
| Front Camera | 12 MP, f/2.2, 26mm (wide), Dual Pixel PDAF, Auto-HDR | 12 MP, f/1.9, 23mm (wide), Dual Pixel PDAF, Auto-HDR |
| Video Recording (Rear) | 8K@24/30fps, 4K@30/60fps, 1080p@30/60/240fps, 720p@960fps, HDR10+, stereo sound rec., gyro-EIS | 4K@24/25/30/60fps, 1080p@25/30/60/120/240fps, HDR10, Dolby Vision HDR (up to 60fps), stereo sound rec. |
| Video Recording (Front) | 4K@30/60fps, 1080p@30/60fps | 4K@24/25/30/60fps, 1080p@25/30/60/120fps, gyro-EIS |
• Pro mode: unlocking manual controls on your phone.
The iPhone 14 Pro Max does not have a traditional “Pro” camera mode similar to what you might find on some Android devices like the Samsung Galaxy S23 Ultra. However, it does offer a range of advanced camera features and settings that give users a high level of control over their photography, including:
- ProRAW: This format allows for more extensive editing options by preserving more image data than standard JPEG or HEIF formats.
- ProRes Video: High-quality video recording format used in professional video production.
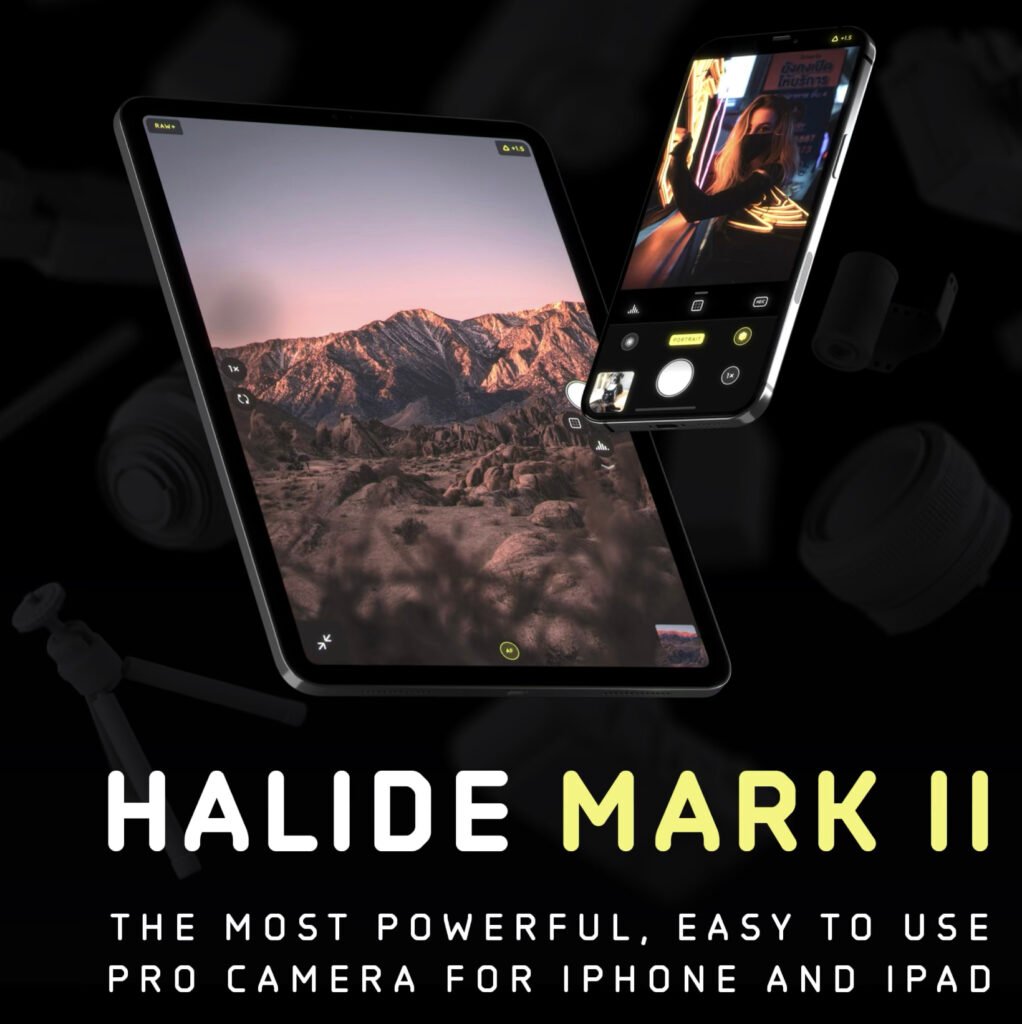
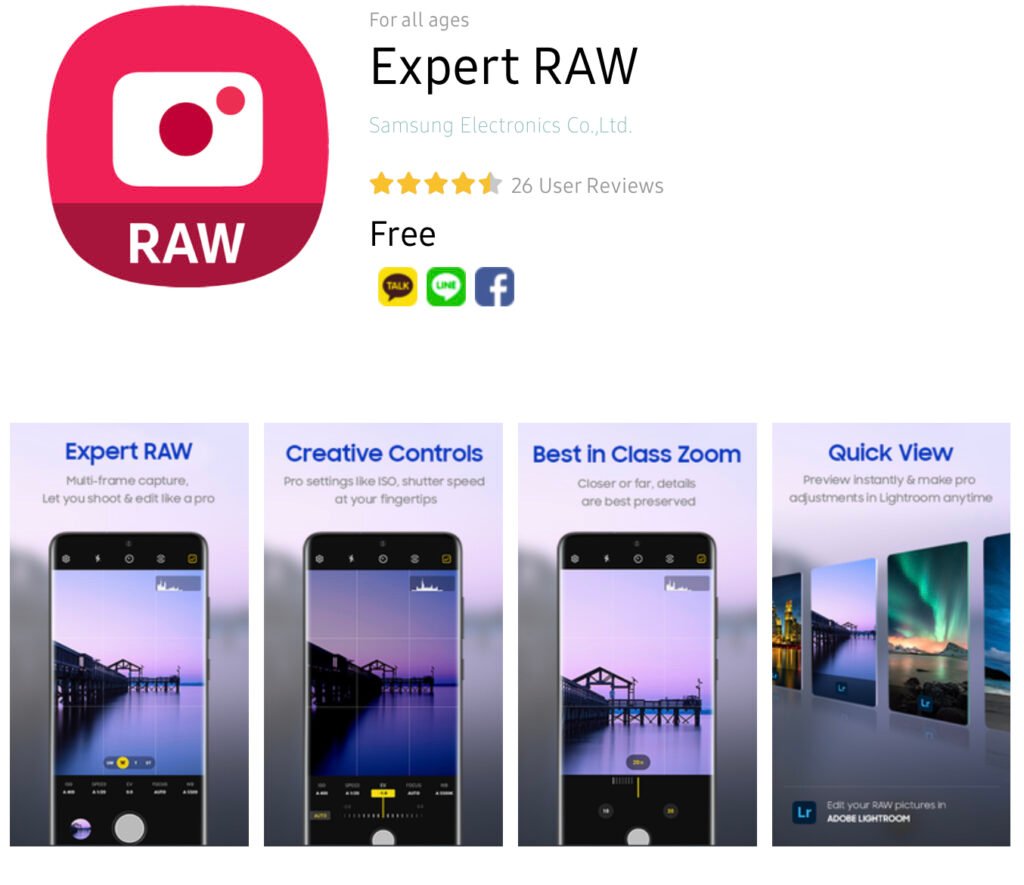
- Manual Controls: While not labeled as “Pro” mode, third-party apps such as Halide and ProCam offer manual control over settings like ISO, shutter speed, white balance, and focus.
These features collectively provide a robust and professional-level photography and videography experience, even if they are not bundled under a specific “Pro” mode.
The Samsung Galaxy S23 Ultra does have a Pro camera mode called Expert Raw. This mode offers users extensive manual controls over various camera settings, providing a professional-level photography experience. In Pro mode, you can adjust settings such as:
- ISO: Control the camera’s sensitivity to light.
- Shutter Speed: Adjust the duration the camera’s shutter is open to control exposure.
- Aperture: While the physical aperture is fixed, the software can simulate different aperture effects.
- White Balance: Adjust the color temperature to match different lighting conditions.
- Focus: Manually adjust the focus for precise control.
- Exposure Compensation: Adjust the exposure to make the image brighter or darker.
- ND Filters: Add digital ND filtering from 2-1000 to help control light.
Pro mode on the Samsung Galaxy S23 Ultra allows users to fine-tune their photography settings to capture high-quality images in a variety of lighting and environmental conditions.
Samsung S23 Ultra – Expert Raw.
When i don’t have my Dslr with me and i need to take photos i use my Samsung S23 Ultra shooting in Expert Raw. Expert Raw gives me the manual functionality that i love in my DSLR but in a camera i can carry around with me. For this tutorial i will be using my S23 Ultra. If you are an iPhone user i would highly recommend using one of the two apps featured above, they will give you similar functionality as Expert Raw does on Android. Don’t be fooled by the power of smartphone camera’s, using the following smartphone camera techniques will greatly improve you image taking when you don’t have your trusty DSLR to hand.
Settings in Expert Raw.
The First thing you should do is launch the Expert Raw app on your smartphone. This will be a separate app to the camera app. On my Samsung S23 Ultra the app looks like this:

After you launch the app you will get a screen similar to the camera app on your phone but with a set of different tools you can use.

After you click the settings icon make sure the following are activated and switched on
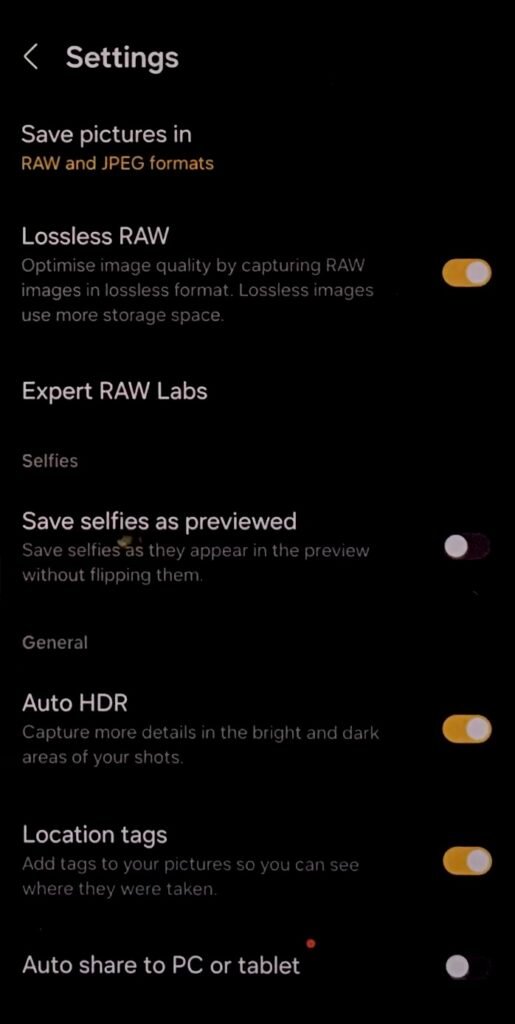

Once you have selected the above settings, save and go back to main camera screen. On the left hand side above the settings icon you will see a series of icons for different tools you can use to make your smartphone camera perform better.
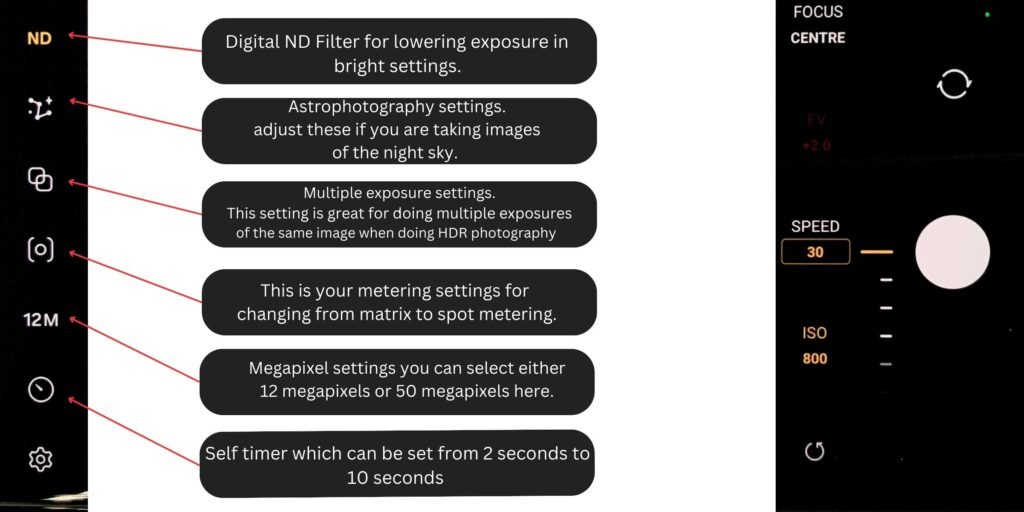
Digital ND filters.
The first icon at the top of the list is Digital ND (Neutral Density) filters, on smartphones they replicate the function of physical ND filters traditionally used in photography. They diminish the intensity of light reaching the camera sensor without affecting the image’s color fidelity. This permits longer exposure times or the use of wider apertures in bright conditions, preventing overexposure.
In strong light, digital ND filters facilitate the capture of motion blur effects, like flowing water or drifting clouds, by allowing for slower shutter speeds. They are also beneficial for creating a shallow depth of field with wide apertures, resulting in a blurred background (bokeh effect). By digitally controlling the light exposure, these filters give photographers more creative flexibility in various lighting conditions.
In essence, digital ND filters expand the capabilities of smartphone cameras, making it easier for users to experiment with different photographic techniques that would be difficult to achieve under bright lighting.

Alternatives to Digital ND Filters.
If your Smartphone app doesn’t have the options for Digital ND filters you can buy screw or clip on ND filters for your rear camera on your smart phone. The best ones I’ve see and used are from a company called Freewell, they are of the highest quality, they have a full range of cases, lenses and filters for Smartphone photography.
Astrophoto tool.
Next on the list is the Astrophoto tool.
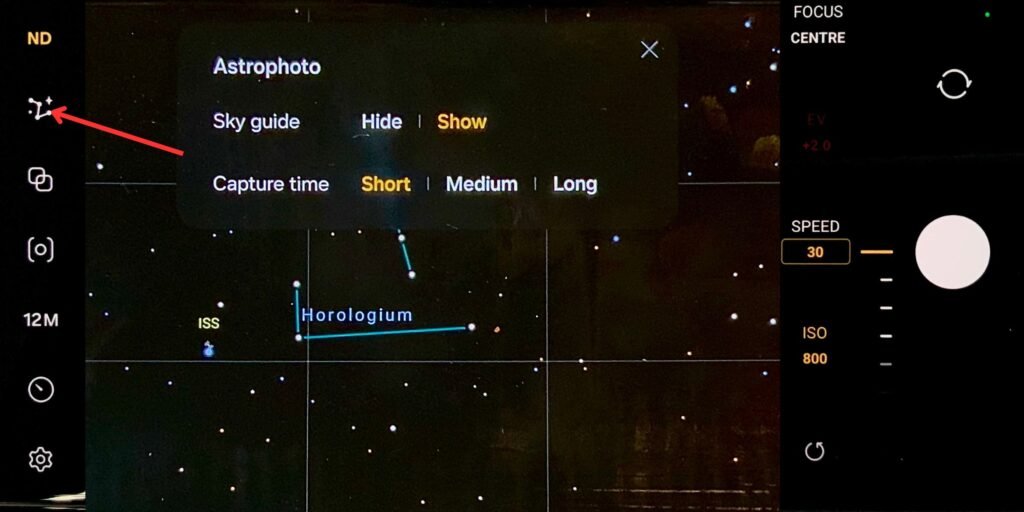
The Astrophoto tool in Android’s Expert RAW app is tailored for capturing detailed images of the night sky using a smartphone. It utilizes advanced computational photography to merge multiple long-exposure shots, reducing noise and enhancing clarity and detail.
This feature automatically identifies the night sky and adjusts settings such as exposure time and ISO to capture the faint light of stars and celestial objects effectively. Intelligent algorithms align and stack the images, ensuring sharp and vibrant results even if there are minor hand movements during shooting.
Moreover, the Astrophoto tool provides manual adjustment options, allowing users to tweak settings like focus and exposure to their liking. This makes high-quality astrophotography accessible to amateur astronomers and photography enthusiasts, enabling them to capture breathtaking night sky images without needing specialised equipment. To get the most out of this feature i would highly recommend that you place the phone onto a tripod with a phone holder. You can check out some of my tripod recommendations in this article.
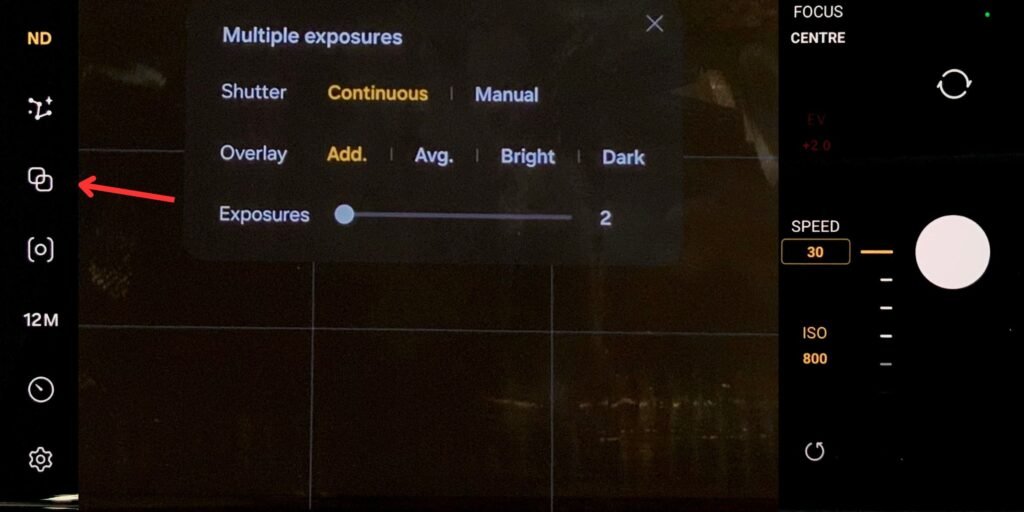
Multiple exposure tool.
Next on the list is the multiple exposure tool.
The multiple exposures tool in Expert RAW lets photographers blend several images into one, creating unique, artistic photos. By combining multiple shots, you can achieve effects like motion blur, light trails, or surreal compositions.
The shutter setting is crucial; it controls how long the camera’s sensor is exposed to light. Longer exposures capture more light, useful for low-light scenes or creating motion effects. Shorter exposures are better for freezing action or reducing blur.
The overlay setting helps align the images during the multiple exposure process. It shows a semi-transparent preview of previous shots, allowing you to position subsequent shots precisely. This is especially helpful for creative effects where exact alignment is key.
Using these settings, you can experiment and create stunning, layered photographs. The multiple exposures tool transforms simple scenes into complex, visually striking images, adding a creative dimension to smartphone photography.
Metering Mode tools.
Next on the modes is the metering modes.

This will take you to the metering section. Where you will have 2 options. One for spot metering and the other is for matrix metering. Both do very different things so select which one is appropriate for the images you want to shoot.
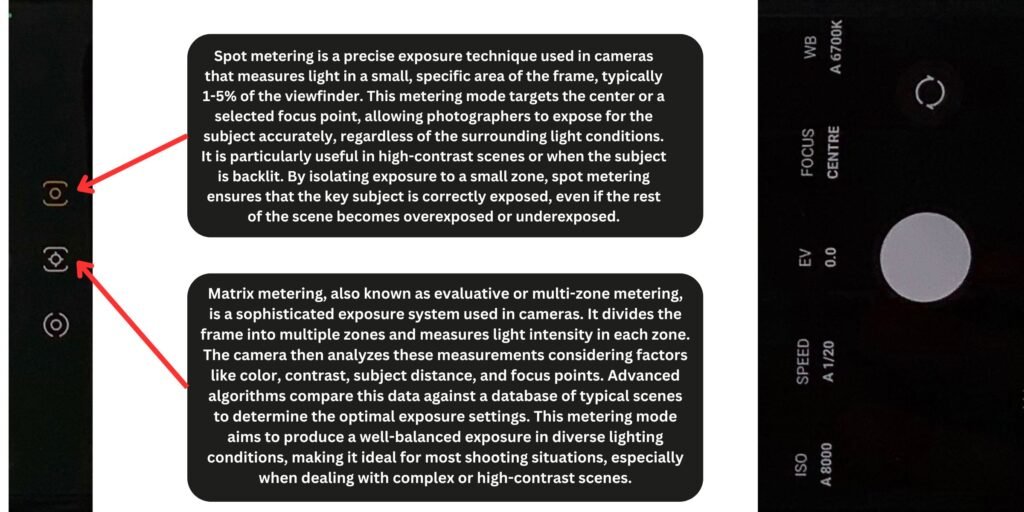
Matrix Metering.
Also known as evaluative or multi-zone metering, is a sophisticated exposure system used in cameras. It divides the frame into multiple zones and measures light intensity in each zone. The camera then analyzes these measurements considering factors like color, contrast, subject distance, and focus points. Advanced algorithms compare this data against a database of typical scenes to determine the optimal exposure settings. This metering mode aims to produce a well-balanced exposure in diverse lighting conditions, making it ideal for most shooting situations, especially when dealing with complex or high-contrast scenes.
Spot Metering.
Spot metering is a highly accurate exposure method in cameras, focusing on a small, specific part of the frame, usually 1-5% of the viewfinder area. This mode prioritizes the center or a chosen focus point, allowing precise exposure for the subject, independent of the surrounding light. It’s especially effective in high-contrast environments or when the subject is backlit. By concentrating on a small zone, spot metering ensures the primary subject is correctly exposed, even if it results in the rest of the scene being overexposed or underexposed.
Megapixel setting.
The next tool is where we set the megapixels for our image. The standard is set to 12 megapixels but you can change this to 50 megapixels if you want. The choice is yours.
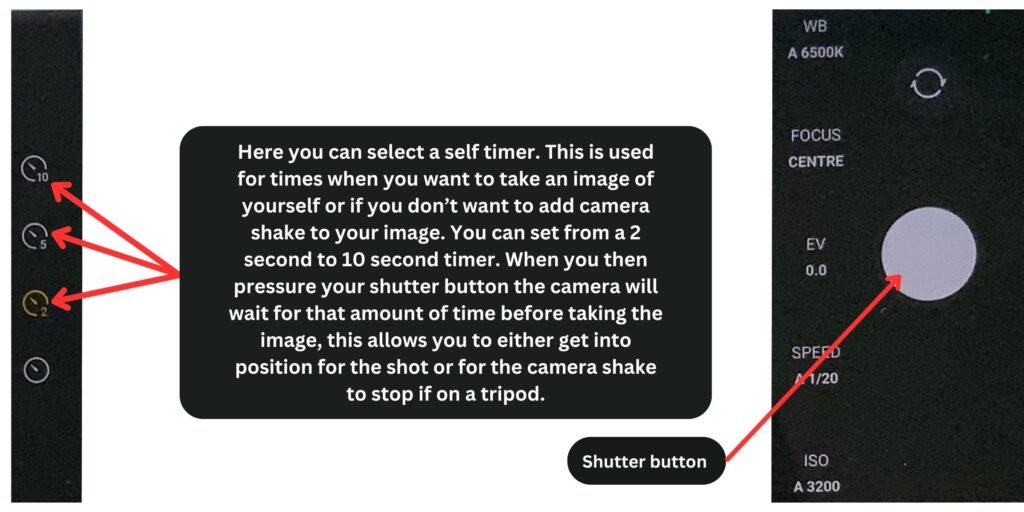
Self timer.
Have you ever found yourself in a position where you want to take pictures of yourself or a group of people but there’s no-one around to take the picture for you, this is we’re the self timer comes in. You set it from 2 seconds to 10 seconds, you press the shutter button, get into position, the timer will count down and then take the image. It’s also a very important tool if you are doing long exposure photography. In this situation you do not want to add camera shake to your image, you would place your smartphone on a tripod, set your timer, then press your shutter. This gives the camera enough time to stop moving before the image is taken, reducing the phone movement resulting in a sharper image.
There you have it folks. These are the extra settings you get with the expert raw app. These allow you to do a lot more manual manipulation that you can’t normally do with the standard camera app on your smartphone. Plus you images are now captured in Raw format so gives you more post processing options than you would get in jpeg format. Using the smartphone camera techniques you can create stunning images on your smart phone that you couldn’t do before. This opens up a whole new world of ideas that just wasn’t possible before with the standard camera app on your phone.
Mastering Light with Your Smartphone.
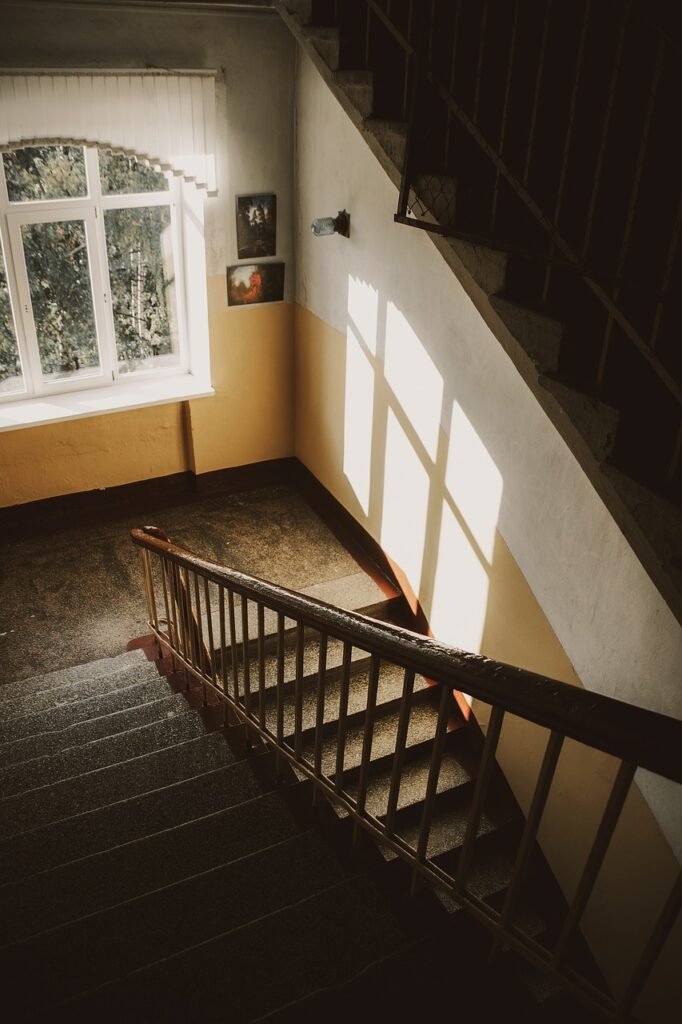
Harnessing natural light: windows, golden hour, and blue hour.
Natural light holds a remarkable ability to shape our environments and influence our moods. Windows, serving as portals to the outside world, play a crucial role in this process. Whether it’s the gentle morning rays entering the kitchen or the soothing glow of the evening sun filling a living room, windows capture the dynamic beauty of the sky and bring it indoors.


The golden hour, occurring shortly after sunrise and just before sunset, is revered for its warm, I soft light. This time of day, beloved by photographers and artists, casts a gentle glow that can transform ordinary moments into something extraordinary. Imagine sitting by a window during this time, as the room becomes bathed in a honeyed light. It’s a serene experience, perfect for reflection and appreciating the beauty around us. The world outside appears softer and more vibrant, enhanced by the warm tones of the golden hour.
On the other hand, the blue hour—just before dawn and after sunset—offers a cool, tranquil light. This period, marked by deep blues and subtle transitions, provides a sense of calm and peace. The sky’s gradual shift from night to day or day to night creates a serene atmosphere. Sitting by a window during the blue hour, enveloped in its cool light, invites introspection and a quiet sense of stillness. It’s an ideal time to relax and unwind.
In our fast-paced, technology-driven lives, these moments of natural light are invaluable. They connect us to the natural rhythms of the day. By thoughtfully designing spaces with well-placed windows and considering the timing of natural light, we can create environments that nurture our well-being. The golden and blue hours offer daily opportunities to pause, gaze out, and feel a deeper connection to the world beyond our windows.
Dealing with challenging lighting: backlight and low light scenarios.
Dealing with challenging lighting, such as backlight and low light, can be tricky, but modern smartphones equipped with expert raw settings make it easier. When facing backlight scenarios, the key is to manage the intense light coming from behind the subject. On a smartphone, enable HDR mode to balance the exposure, ensuring both the subject and background are visible. Manually adjusting the exposure can also help; tap on the subject and slide the brightness level to achieve the desired effect.

In low light conditions, the expert raw settings on smartphones come in handy. These settings allow for more control over ISO, shutter speed, and aperture. Increase the ISO to make the sensor more sensitive to light, but be cautious to avoid excessive noise. Slowing down the shutter speed can also capture more light, though a steady hand or a tripod is necessary to prevent blur.
Additionally, leveraging the raw format is beneficial in post-processing. Raw files retain more detail than JPEGs, allowing for greater flexibility in editing. Use apps like Adobe Lightroom to adjust exposure, contrast, and noise reduction.
By understanding and utilising these techniques, smartphone photographers can capture impressive images even in challenging lighting conditions.
Creative Smartphone Photography Techniques.
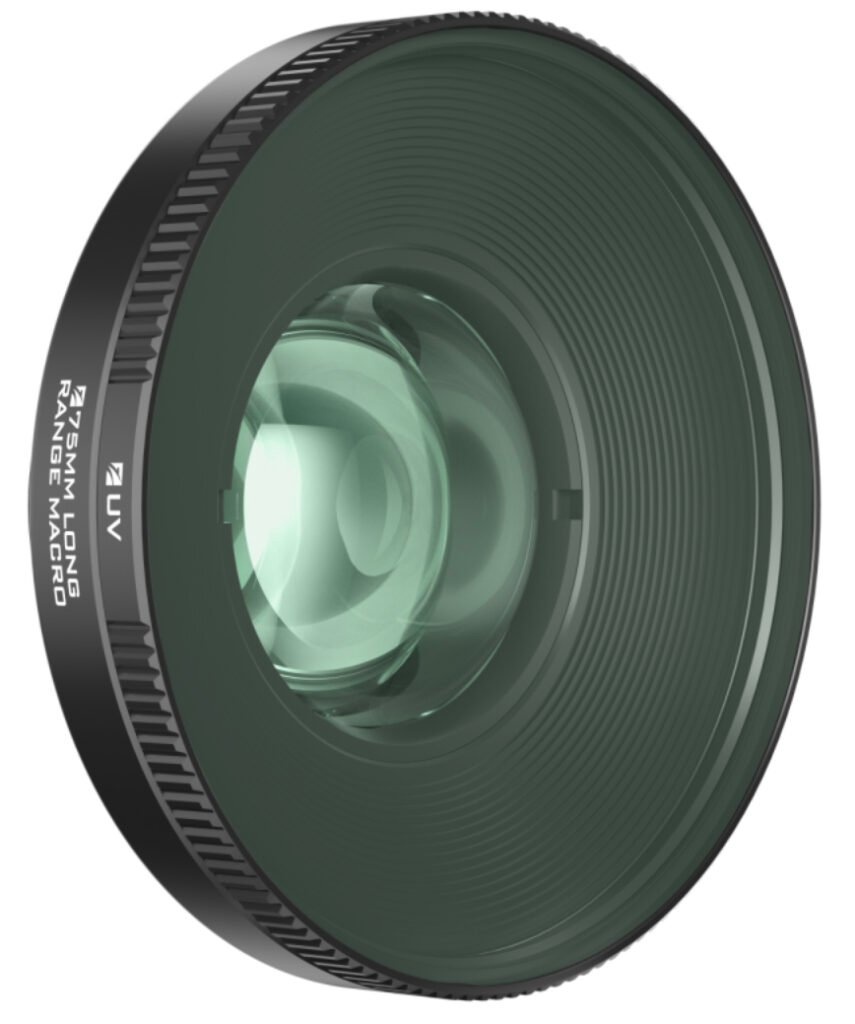
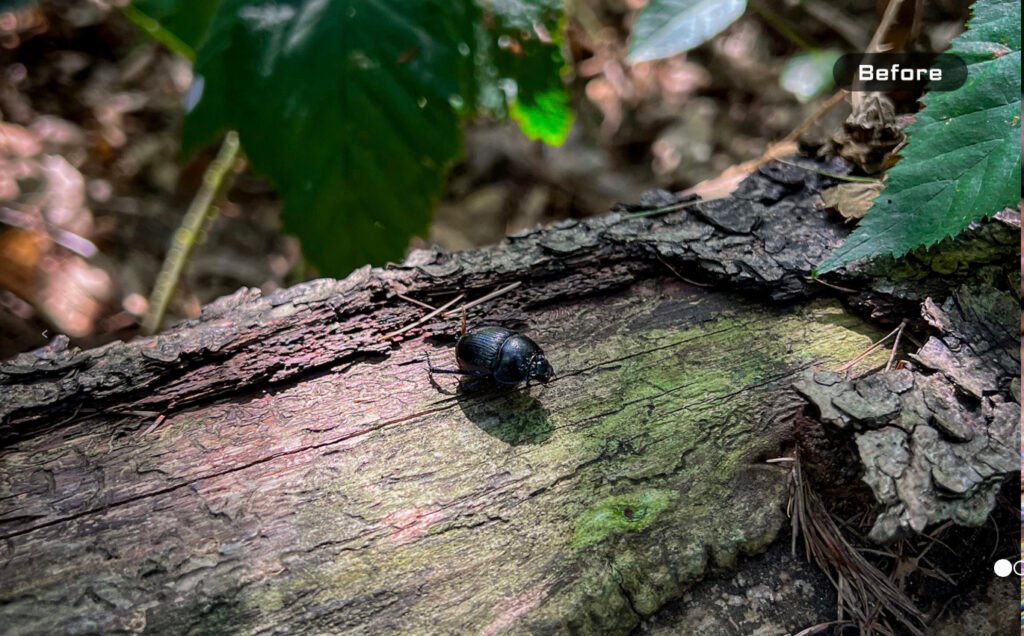
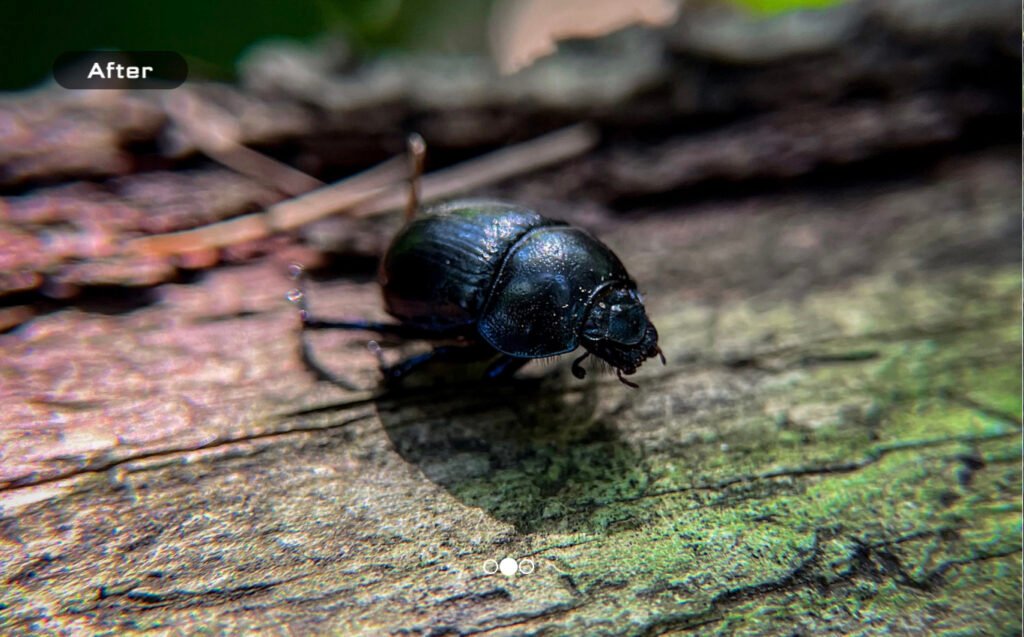
Macro photography with phone lenses.
Freewell do some lenses including macro lenses, theses are attachable lenses that clip over the rear lenses of your camera. They are of the highest quality and are one of the best on the market in 2024.
Light painting in the dark.
Capturing light paintings with your smartphone’s expert RAW mode can transform an ordinary night into a canvas of luminous art. This technique lets you play with light in ways that defy conventional photography, resulting in images that seem almost magical.

First, you’ll need to get comfortable with your phone’s manual settings. Find a dark location and set up your device on a sturdy tripod. Switch to expert or pro mode and enable RAW capture. Now, the real experimentation begins.
Adjust your exposure time – anywhere from 5 to 30 seconds usually works well. Tweak your ISO and aperture to balance light sensitivity with depth of field. Once set, it’s time to paint.
Light sources are your brushes. Wave a flashlight, spin some LEDs, or even use car headlights in the distance. Each movement creates streaks and patterns of light that the camera captures over time. It’s a bit like drawing in the air with sparklers, but with more control and less risk of singed eyebrows.
Try spelling out words, creating abstract shapes, or illuminating objects in creative ways. Don’t worry if your first attempts look like a jumbled mess – that’s part of the learning process. With each shot, you’ll gain insight into how your movements translate to the final image.
Common Smartphone Photography Mistakes to Avoid.
Relying too heavily on digital zoom.
The issue a lot of people find is that they rely heavily on digital zoom. The camera lenses on smart phones are fixed focal length, as soon as you start to zoom in you are not zooming with the lense but you are zooming into the pixels of your image. It doesn’t take long for your images to become grainy and pixelated. You are better of capturing your images wide to get the best possible quality. You can also get clip on lenses that will optically allow you to zoom like the one from Freewell.
Neglecting to clean your lens.
Nothing ruins an image more than having a dirty lens. Always carry a microfibre cloth with you and clean off your lenses before taking your photos. It might sound obvious but many a good photograph has been ruined by a dirty lens.
Ignoring alternative angles and perspectives.
The key to great photos is always looking for alternative angles and perspectives. Get down low to the ground, find interesting perspectives that lead the views eyes towards your subject. Too often people take photos at eye level and miss some amazingly interesting shots. The difference sometimes between a good image and a great image is angles and perspectives.
Over-editing and losing natural appeal.
Editing is a personal thing. What one persons likes another might not. The key to a good image is not to over-process it. Shooting in raw allows you to have more control over your editing, things like colour temperature, saturation, contrast, highlight control, shadow control, sharpness and many more. As you get more experienced at editing you will know what an image needs to make it pop. Practice is key. Try out different things but just remember keep it natural.
Taking Your Mobile Photography to the Next Level.
Accessories to enhance your smartphone camera.
- A tripod.
- A tripod phone holder.
- ND filters.
- Clip on lenses.
- A good case to protect your phone.
Joining mobile photography challenges and communities.
There are plenty of Facebook groups, YouTube channels and local groups and communities that offer challenges that can push you outside your comfort zone, getting involved in groups and clubs is a great way to improve your skills, meet new people and have a great time.
Developing a consistent style or theme.
The one thing you may have noticed is that certain photographers develop a certain style or theme in their photography, this is what will make you stand out from everyone else. It might take you a while trying out different themes and styles until you find one that really suites you. Photography is a life time endeavour so take your time and enjoy our wonderful hobby.
Printing and displaying your smartphone photos.
The issue these’s days is we take so many photos that we don’t print and display them anymore. You should be proud of your images and you should display them. There is nothing better than taking a great photo, getting it printed, framed and hung on the wall. The amazing feeling you get when a friend or family member comments on your images. You never know you could even get them printed in magazines or displayed in galleries.
Conclusion:
There you have it – you’re now armed with the knowledge to turn your everyday smartphone into a powerful photography tool! Remember, the best way to improve is to keep shooting. Don’t be afraid to experiment with angles, lighting, and subjects. Your pocket-sized camera is capable of capturing magazine-worthy shots – all it needs is your creative eye and a bit of practice. So, what are you waiting for? The world is your studio, and your next masterpiece is just a tap away. Get out there, start snapping, and share your incredible smartphone photos with the world. Who knows? Your next shot might just break the internet!