Mastering Photography: Essential Tips for Stunning Shots in 2024.
Introduction:
Lights, camera, action! Photography isn’t just about pressing a button – it’s an art form that captures moments, emotions, and stories in a single frame. Did you know that over 1.4 trillion photos were taken worldwide in 2023? That’s a lot of shutters clicking! Whether you’re a novice with a smartphone or a pro with high-end gear, this guide will help you elevate your photography game. Let’s dive into the world of light, composition, and creativity!
Understanding the Basics of Photography.
Photography is like learning a new language – at first, it might seem overwhelming, but once you grasp the basics, a whole new world opens up to you. Trust me, I’ve been there! When I first picked up a camera, I felt like I was holding a mystical device. But let’s demystify it together, shall we?
First up, let’s talk about camera types. You’ve got your DSLRs, mirrorless cameras, point-and-shoots, and of course, the trusty smartphone in your pocket. Each has its pros and cons. DSLRs offer fantastic image quality and versatility but can be bulky. Mirrorless cameras are the new kid on the block, packing DSLR-like quality in a more compact body. Point-and-shoots are great for beginners, while smartphones… well, they’re always with you, aren’t they?
Now, let’s dive into the holy trinity of photography: the exposure triangle. This isn’t some secret society, I promise! It’s simply the relationship between aperture, shutter speed, and ISO. Aperture controls the amount of light entering your camera and affects depth of field. Shutter speed determines how long your sensor is exposed to light, allowing you to freeze action or create motion blur. ISO is your camera’s sensitivity to light – higher ISO can help in low light but might introduce noise.

let’s break down the above diagram and look a little closer at how changing one side of the triangle effects the other side.
Aperture.
First up is aperture. Think of it as the opening in your camera lens that lets light pass through to reach the sensor. Aperture is measured in f-stops, like f/1.4, f/2, and f/2.8. This setting controls how much light enters your camera and affects the depth of field in your photo, which is basically how much of your picture is in sharp focus.
A lower f-stop number, like f/1.4, means a larger aperture opening. This allows more light in and gives you a shallow depth of field, where your subject is in focus and the background is nicely blurred. This is great for portraits or close-ups where you want your subject to stand out. On the flip side, a higher f-stop number, such as f/16, results in a smaller aperture opening. This allows less light in but gives you a deeper depth of field, keeping both your subject and background in focus. This is perfect for landscapes, cityscapes, or any scene where you want everything in sharp detail.
Shutter Speed.
Next, let’s talk about shutter speed. Shutter speed is simply how fast the shutter in your camera opens and closes, determining how long your camera sensor is exposed to light. It’s measured in seconds or fractions of seconds, like 1/1000, 1/500, or 1/250.
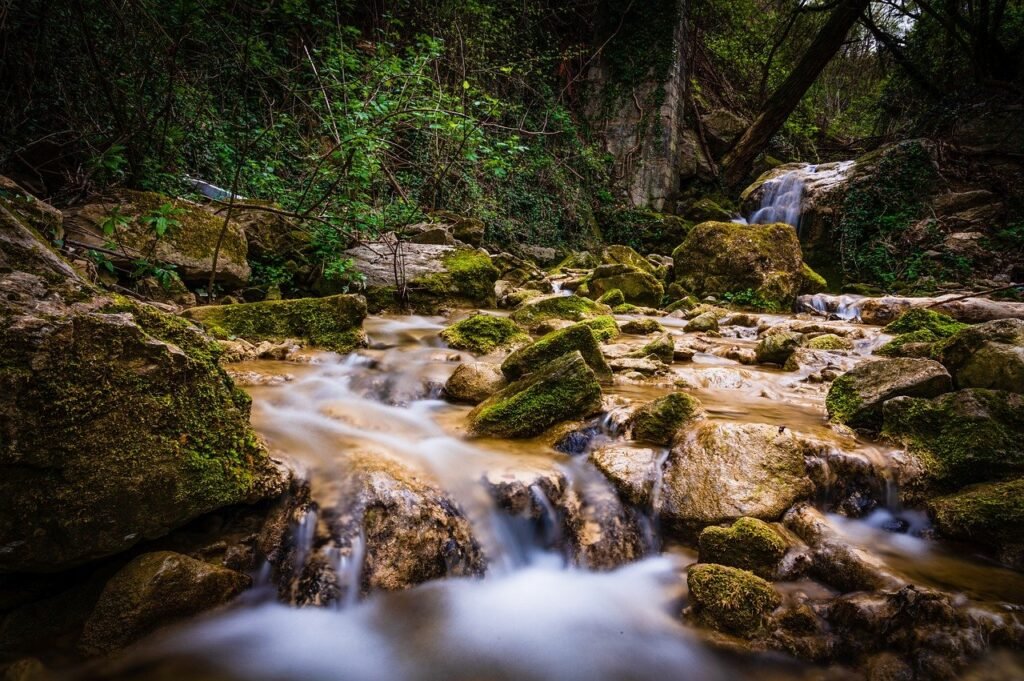
Shutter speed plays a crucial role in your photo’s exposure and can affect motion blur and the freezing of action. A slower shutter speed, like 1/80 or 1/50 of a second, lets more light hit the sensor, resulting in a brighter image but also capturing more movement, which can lead to motion blur. This can be great for creating a sense of motion, like with flowing water or moving cars. However, a faster shutter speed, like 1/1000 or 1/2000 of a second, allows less light but freezes motion, which is ideal for capturing sharp images of fast-moving subjects, such as in sports or wildlife photography. One of my favorites is splash photography—it’s fun and messy, and I highly recommend trying it!
ISO.
Finally, let’s talk about ISO. Unlike aperture and shutter speed, which involve physical mechanics, ISO is all about digital adjustments. ISO measures the sensitivity of your camera’s sensor to light. In simple terms, it digitally adds exposure to your photo.
ISO is represented by numbers like 100, 200, 400, and so on. A lower ISO number means the sensor is less sensitive to light, resulting in less noise in the image. Higher ISO numbers make your image brighter but can introduce more noise or grain. It’s similar to increasing the brightness too much in editing software, which can lead to a noisy image. Generally, you should use a lower ISO in bright situations, like shooting outdoors on a sunny day, and a higher ISO in low light conditions. I try to keep my ISO below 800 to avoid too much noise, but sometimes you have to go higher and can fix it in editing later.
Putting It All Together.
Now that you understand each corner of the exposure triangle, you need to know if your image is properly exposed. Luckily, most cameras have a handy tool called a histogram. Every photographer should become friends with the histogram. It might seem confusing at first, but the key is to aim for a graph that’s closer to the middle, indicating even exposure. However, a histogram leaning to the left or right isn’t necessarily bad; it’s just a guideline.
With this knowledge, grab your camera and start experimenting. I hope this video helps you grasp the exposure triangle better and takes your photography to the next level. Thanks for watching! If you liked this video, check out another one here and don’t forget to subscribe. And as always, go make some awesome content!
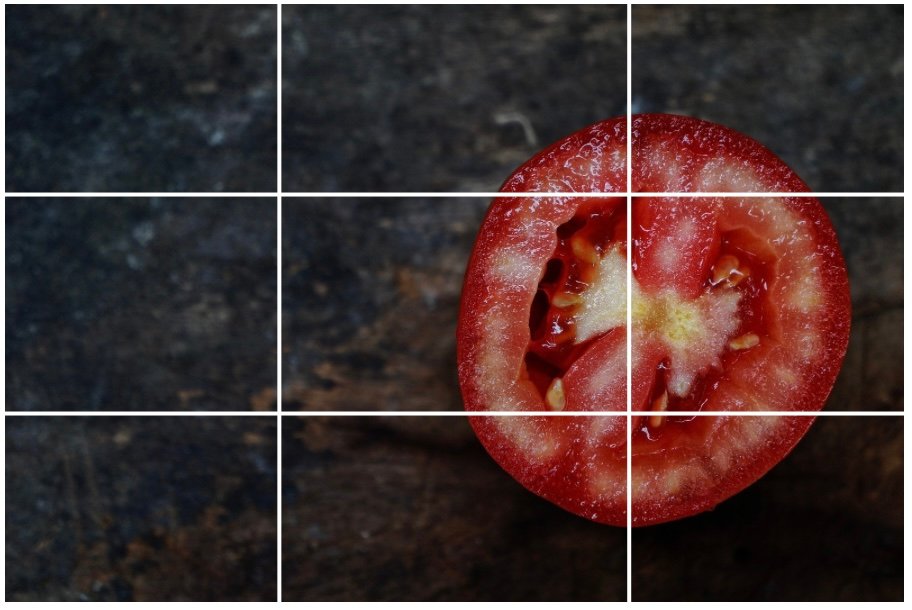
Composition.
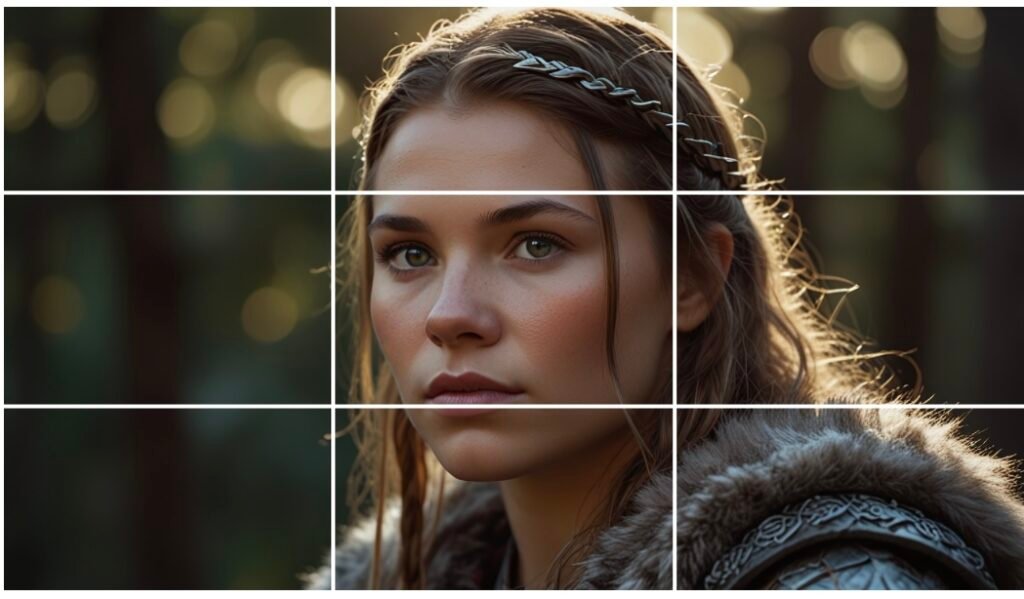
Composition is where the art comes in. The rule of thirds is a great place to start – imagine your frame divided into a 3×3 grid and place your subject along these lines or at their intersections. Leading lines are another powerful tool, guiding the viewer’s eye through your image. Remember, rules are made to be broken, but you’ve got to know them first!
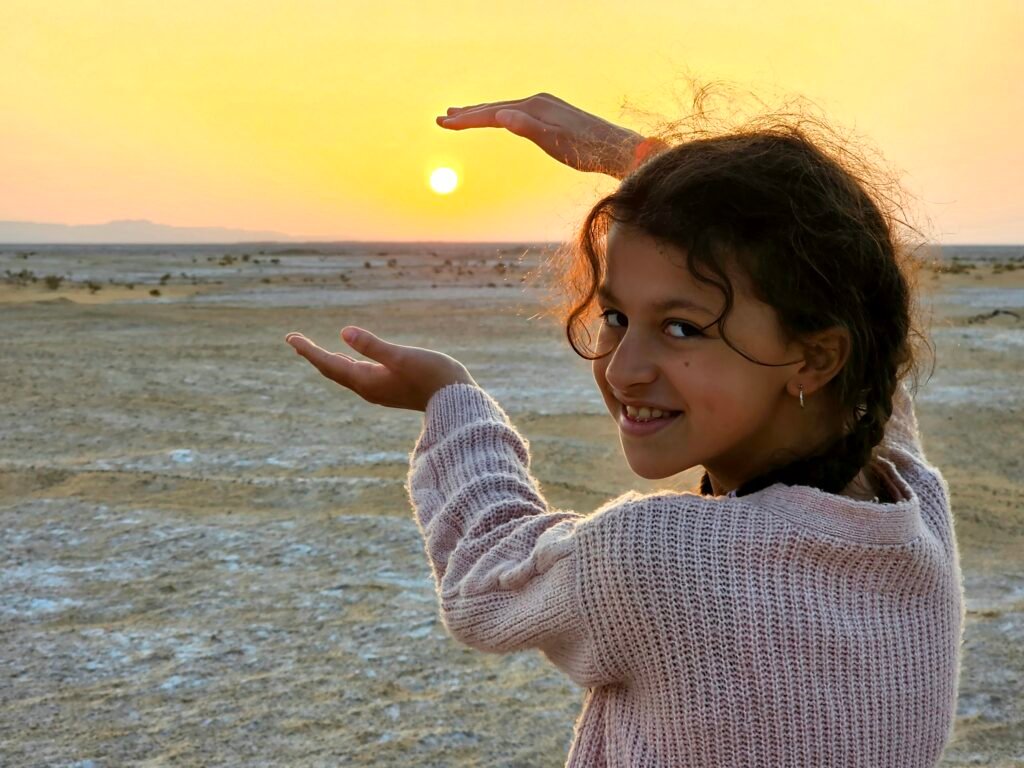
Lastly, let’s shed some light on… well, light! Natural light is your best friend – it’s free and beautiful. The golden hour just after sunrise or before sunset?
Sunrise over the desert in Tunisia.
Sunset over ocean.
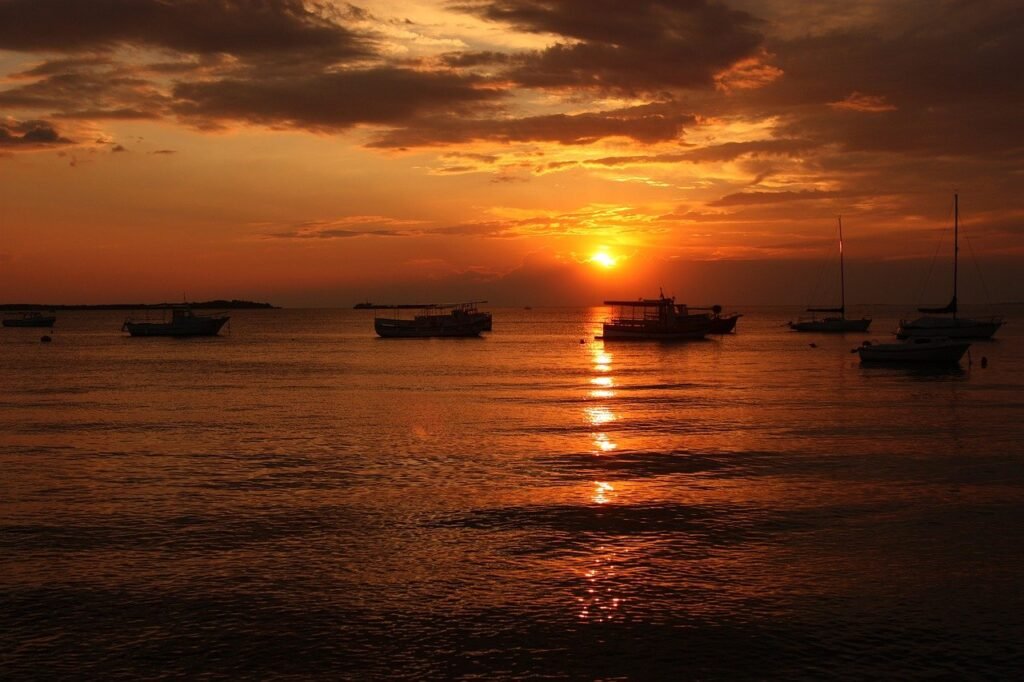
Pure magic! But don’t shy away from artificial light. A well-placed lamp or a flashgun can transform an ordinary shot into something extraordinary.
Remember, every great photographer started as a beginner. The key is to keep shooting, keep learning, and most importantly, have fun!
Essential Camera Settings for Stunning Shots.
Alright, let’s talk settings! I know, I know, it sounds about as exciting as watching paint dry, but trust me, mastering your camera settings is like finding the secret sauce to mouthwatering photos. So, let’s dig in!
Shooting modes.
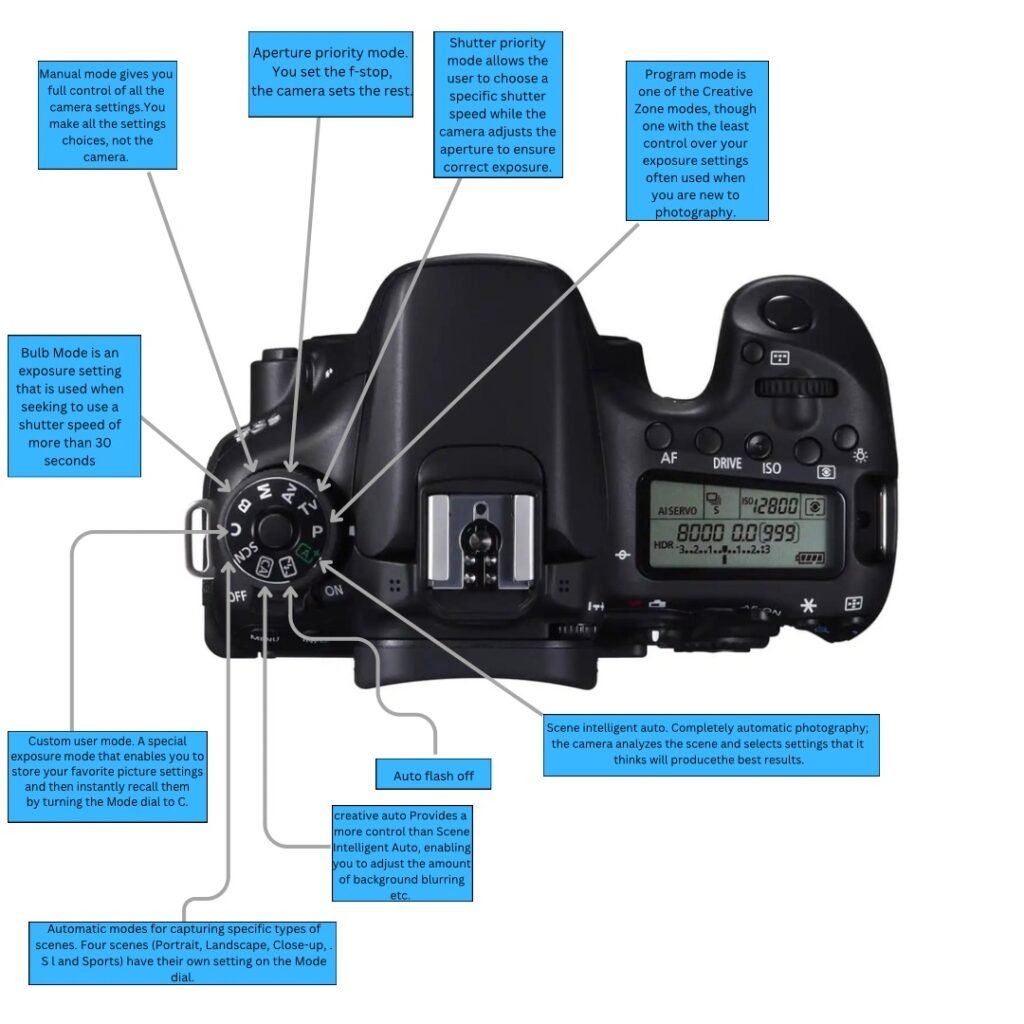
Your camera’s like a swiss army knife – it’s got a tool for every situation. Auto mode is great when you’re starting out or need a quick shot. But once you’re ready to take the training wheels off, it’s time to explore Manual, Aperture Priority, and Shutter Priority modes. Manual gives you full control – it’s like being the captain of your ship. Aperture Priority lets you control depth of field while the camera handles shutter speed – perfect for portraits or landscapes. Shutter Priority is your go-to for action shots, letting you freeze that winning goal or create silky smooth waterfalls.
White balance might sound technical, but it’s just about making sure your whites look white, not yellow or blue. Auto white balance works well most of the time, but learning to adjust it can take your photos from “meh” to “wow!” Ever taken a photo of a beautiful sunset only to find it looks dull and lifeless? Tweaking the white balance can bring back those vibrant oranges and pinks.
In photography, color temperature is a way to describe the characteristics of light, particularly how warm (yellow/red) or cool (blue) it appears. It is measured in degrees Kelvin (K). Here’s a breakdown of the typical color temperature gradients and their uses:
- 1000-2000K: Candlelight
- Very warm, reddish-yellow light.
- Mimics the soft, intimate glow of candles.
- 2000-3000K: Tungsten (Incandescent) Bulbs
- Warm light with a slight yellow/orange tint.
- Common in household lighting and older street lamps.
- 3000-4000K: Early Sunrise/Sunset
- Warm white to slightly warm light.
- Soft, natural tones, often seen during the golden hour.
- 4000-5000K: Fluorescent Lighting
- Neutral white light.
- Can sometimes have a slight green or magenta tint.
- 5000-6000K: Daylight
- Cool white light, typical of midday sun.
- Standard reference point for daylight, often used for natural lighting.
- 6000-7000K: Cloudy Sky or Shade
- Cool white to slightly blue.
- Softens shadows and reduces contrast compared to direct sunlight.
- 7000-8000K: Overcast Sky
- Cooler, more bluish light.
- Often used to simulate overcast conditions or in high altitudes.
- 8000-10,000K: Deep Shade or Blue Hour
- Very cool, blue light.
- Typically found in deep shadows or during twilight before sunrise or after sunset.
Understanding white balance and how colour temperature affects the look of your image you will be able to make sure you set it correctly. If you shoot in raw which you really should be it doesn’t matter what it’s set to as you can alter it in post production. In jpeg though you are stuck with what you have selected.
Focus modes are your secret weapon for tack-sharp images. Single AF is great for stationary subjects, while Continuous AF is your best friend for moving targets. And don’t forget about focus points – they’re like a bullseye for your camera. Use them to nail focus on your subject’s eyes in a portrait, or to emphasize a specific part of a landscape.
Now, let’s tackle the age-old debate: RAW vs. JPEG. Think of RAW as your digital negative – it contains all the data your camera captures, giving you more flexibility in post-processing. JPEG, on the other hand, is like a fully developed photo – ready to use but with less room for adjustment. If you’re serious about photography, shoot in RAW. Yes, the files are bigger, but trust me, you’ll thank yourself later when you’re able to rescue an underexposed shot or fine-tune those colors.
Remember, these settings are tools, not rules. Experiment, play around, and don’t be afraid to make mistakes. That’s how we learn and grow as photographers. And who knows? Your next “mistake” might just turn into your favorite shot!
Mastering Different Photography Genres.
Photography is like a buffet – there’s something for everyone! Whether you’re drawn to sweeping landscapes, captivating portraits, gritty street scenes, or the tiny worlds of macro photography, each genre has its own challenges and rewards. Let’s explore them together!
Landscape photography.
Landscape photography is all about capturing the awe-inspiring beauty of our world. It’s about waking up at ungodly hours to catch that perfect sunrise, or braving the elements for that epic shot. But oh, the rewards! There’s nothing quite like the feeling of capturing a scene that makes viewers say, “I wish I was there!” The key to great landscape photos? Patience, planning, and a good tripod. Use a small aperture (high f-number) for maximum depth of field, and don’t forget to include foreground elements to add depth to your composition.
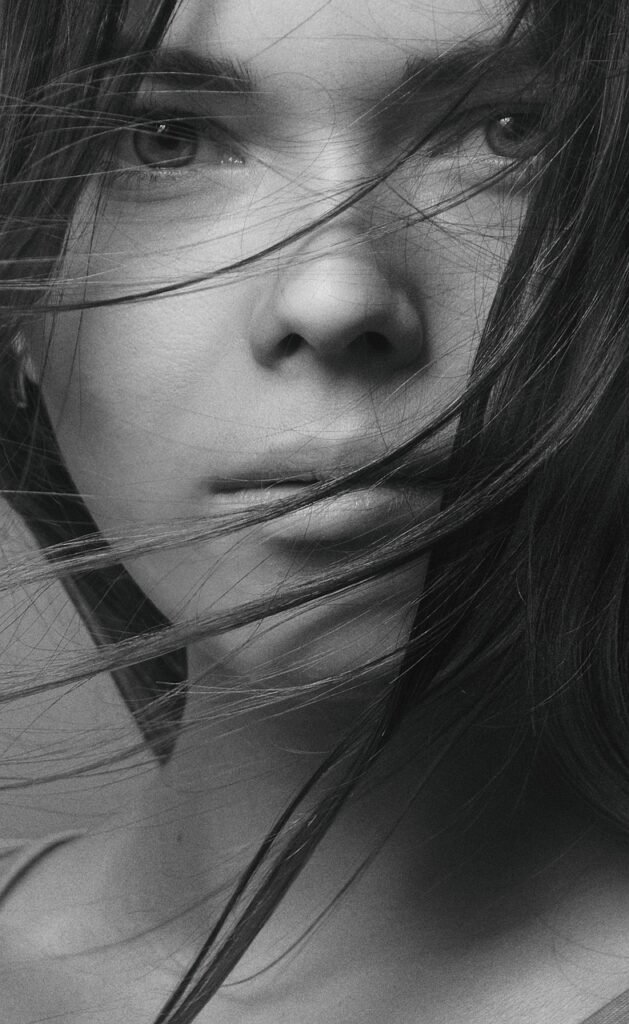
Portrait photography.
Portrait photography is a dance between photographer and subject. It’s not just about making someone look good – it’s about revealing their personality, their soul. Make your subjects comfortable – chat with them, joke around, let them relax. Use a wide aperture (low f-number) to blur the background and make your subject pop. And remember, the eyes are the windows to the soul – make sure they’re in sharp focus!
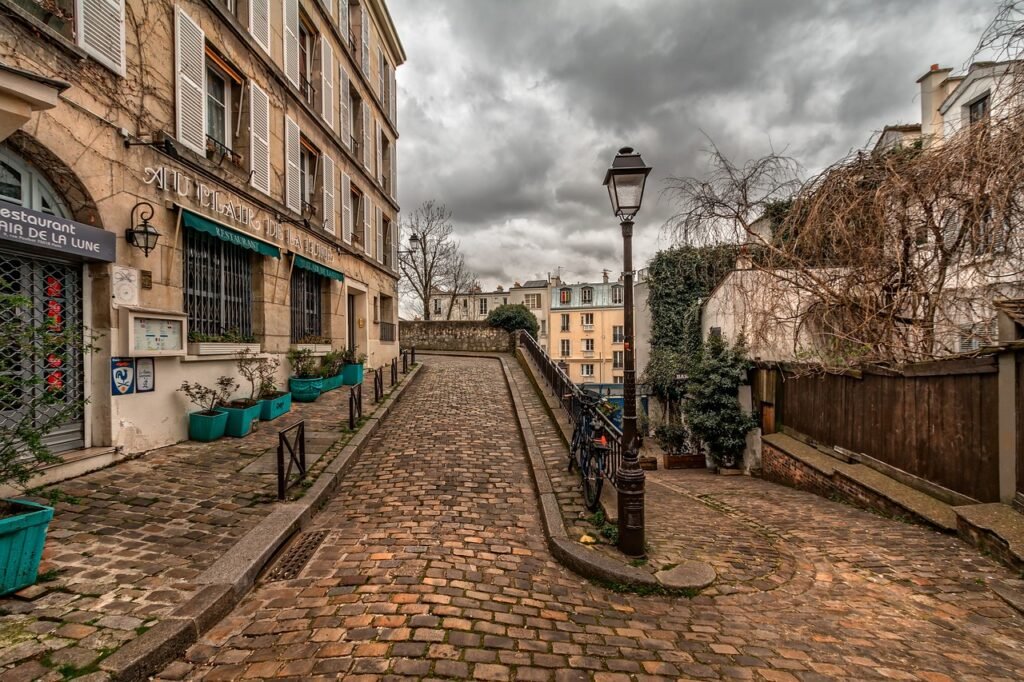
Street photography.
Street photography is like being a visual storyteller of everyday life. It’s about capturing those fleeting moments that others might miss. It can be intimidating at first – pointing your camera at strangers isn’t for the faint-hearted! But it’s also incredibly rewarding. Learn to observe, to anticipate moments before they happen. Use a small, unobtrusive camera if you can, and consider using zone focusing to capture quick, candid shots. Street photography is also great for using the technique called HDR.
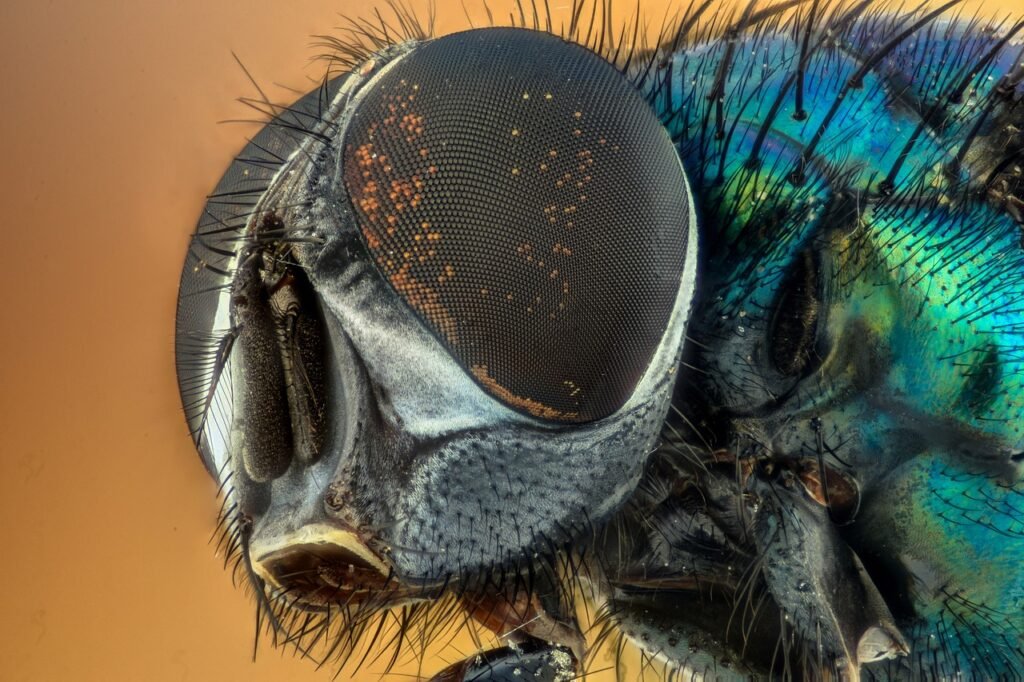
Macro photography.
Macro photography is like discovering a whole new world. Suddenly, a tiny flower becomes a vast landscape, a bug transforms into an alien creature. It’s a genre that rewards patience and precision. You’ll need a macro lens or extension tubes, and a steady hand (or better yet, a tripod). Light is crucial in macro – consider using a ring light or a diffused flash to illuminate your tiny subjects.
Remember, these genres aren’t mutually exclusive. Some of the most interesting photos come from blending different styles. A landscape with a human element, a street portrait, a macro shot in a wider scene – the possibilities are endless! So don’t limit yourself. Explore, experiment, and find your unique voice as a photographer. After all, the best genre is the one that makes your heart sing when you press that shutter button!
Post-Processing: Bringing Your Photos to Life.
Post-processing is where the magic happens. It’s like being a chef – you’ve got your raw ingredients (your photos), and now it’s time to cook up something delicious! But remember, just like cooking, the goal is to enhance, not overpower. You want your viewers saying “Wow, what a great photo!” not “Wow, what great Photoshop skills!”
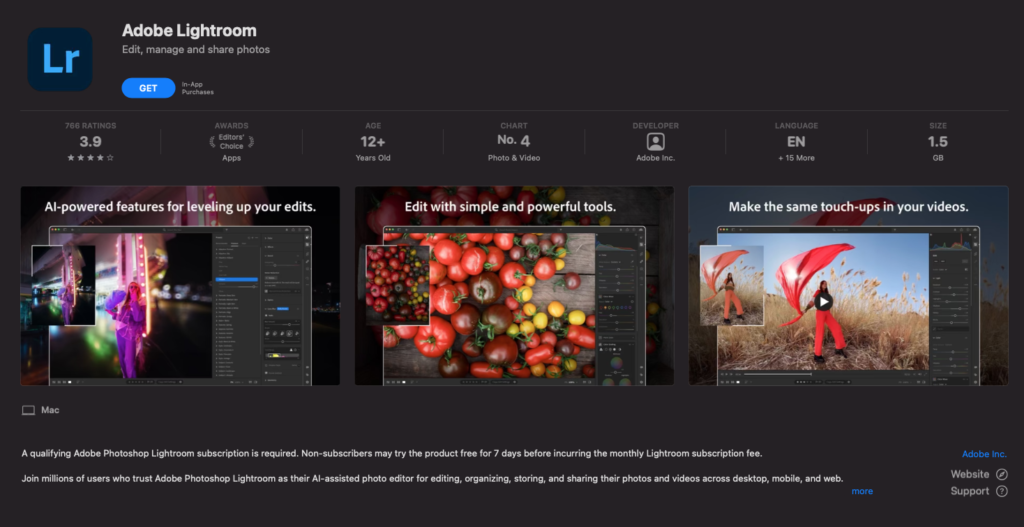
Let’s start with the software. Adobe Lightroom and Photoshop are the industry standards, but they’re not the only options. Capture One is fantastic for tethered shooting and color grading, while free options like GIMP and Darktable are great for beginners. Personally, I use a combination of Lightroom for overall adjustments and Photoshop for more detailed work. Find what works for you and your budget.
Basic editing techniques are your bread and butter. Cropping can dramatically improve composition – don’t be afraid to cut out distracting elements. Exposure adjustment can rescue under or overexposed shots (to a point – it’s not magic!). Color correction is crucial – getting your white balance right can transform a dull image into a vibrant masterpiece. Remember, subtlety is key. Small adjustments can make a big difference.
Advanced editing opens up a world of possibilities. HDR (High Dynamic Range) can help you capture scenes with extreme contrast, like a bright sky over a darker landscape. Selective adjustments allow you to tweak specific parts of your image – brighten a face, darken a distracting background. Retouching is a sensitive topic – my advice? Keep it natural. Remove temporary blemishes if you must, but don’t change someone’s fundamental appearance.
Developing your unique editing style is a journey. Look at photographers you admire, try to understand how they edit, but don’t just copy them. Experiment, play around, find what resonates with you. Maybe you love the moodiness of dark, contrasty images. Or perhaps you’re drawn to bright, airy looks. Your style will evolve over time, and that’s okay!
A word of caution: it’s easy to get carried away with editing. We’ve all been there, pushing those sliders to the max! But remember, good editing should be invisible. If the first thing someone notices about your photo is the editing, you might want to dial it back a bit.
Lastly, don’t forget to have fun! Post-processing is a chance to let your creativity run wild. Try wild color grades, experiment with composites, play with digital art. Not every experiment will be a masterpiece, but you’ll learn something new every time. And who knows? You might just discover a new technique that becomes your signature style!
Gear Guide: Choosing the Right Equipment.
Ah, gear! It’s the topic that can make photographers’ eyes light up and wallets tremble. But here’s a secret: the best camera is the one you have with you. That said, having the right tools can certainly make your photographic journey easier and more enjoyable. So let’s talk shop!
The great debate: DSLR vs. Mirrorless. DSLRs have been the workhorses of photography for years. They offer great battery life, a wide range of lenses, and that satisfying mirror slap. Mirrorless cameras are the new kids on the block, offering similar image quality in a smaller, lighter package. They’re great for travel and street photography. Personally, I switched to mirrorless a few years ago and haven’t looked back. But try both if you can – see what feels right in your hands.
Here is a comparison table between the Canon EOS 1D X Mark III DSLR which is was canons flag ship dslr and ten top mirrorless cameras:
| DSLR | Comparable Mirrorless | Weight Saving (g) | Size Difference (mm) |
|---|---|---|---|
| Canon EOS 1D X Mark III | Canon EOS R5 | 702 | 85.0 |
| Canon EOS 1D X Mark III | Sony A7R IV | 775 | 106.2 |
| Canon EOS 1D X Mark III | Nikon Z7 II | 735 | 105.0 |
| Canon EOS 1D X Mark III | Panasonic Lumix S1R | 420 | 53.4 |
| Canon EOS 1D X Mark III | Canon EOS R6 | 760 | 84.7 |
| Canon EOS 1D X Mark III | Sony A7 III | 790 | 112.8 |
| Canon EOS 1D X Mark III | Nikon Z6 II | 735 | 105.0 |
| Canon EOS 1D X Mark III | Fujifilm X-T4 | 833 | 117.8 |
| Canon EOS 1D X Mark III | Panasonic Lumix GH5 II | 713 | 85.0 |
| Canon EOS 1D X Mark III | Olympus OM-D E-M1 Mark III | 860 | 115.1 |
- Weight Saving (g): The difference in weight between the Canon EOS 1D X Mark III and each mirrorless camera.
- Size Difference (mm): The total dimensional difference (sum of Width, Height, Depth differences). Positive values indicate the DSLR is larger.
The Canon EOS 1D X Mark III is a larger and heavier DSLR, leading to more significant weight and size savings when switching to these mirrorless alternatives.
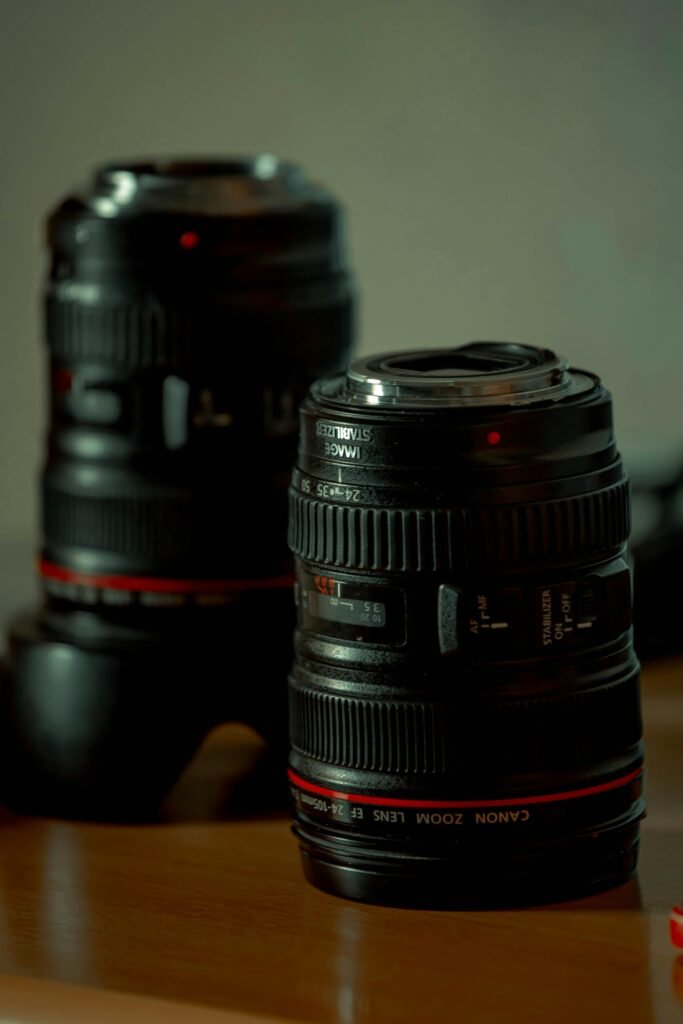
Lenses are where the magic happens. A great lens on an average camera will usually produce better results than an average lens on a great camera. Understanding focal lengths is key. Wide-angle lenses (below 35mm) are great for landscapes and architecture. Standard lenses (around 50mm) are versatile all-rounders. Telephoto lenses (above 70mm) are perfect for wildlife and sports. Zoom lenses offer flexibility, while prime lenses often provide better image quality and wider apertures. My advice? Start with a versatile zoom, then add primes as you discover your preferred style.
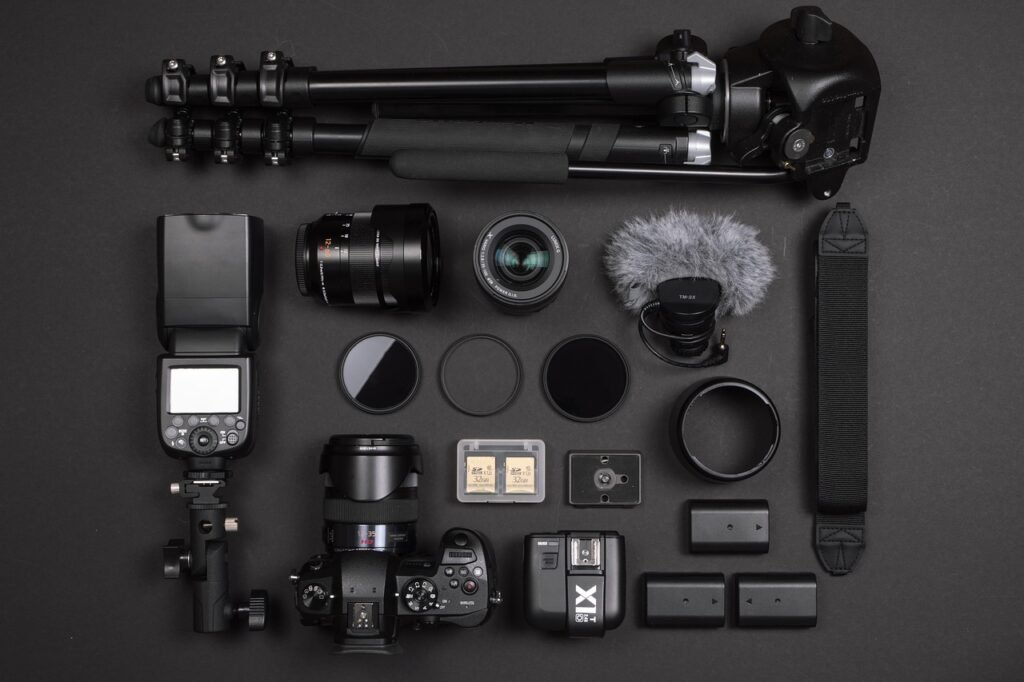
Don’t forget the accessories! A good tripod is worth its weight in gold for landscape and low-light photography. Filters can help in tricky lighting situations – a polarizer can reduce reflections and boost colors, while ND filters allow for long exposures in bright light. For portraits, a simple reflector can work wonders. And always, always have spare batteries and memory cards!
Now, let’s talk budget. Photography can be an expensive hobby, but it doesn’t have to be. If you’re just starting out, consider buying used gear. Personally I always bay used gear, but I make sure its from a reputable company. I use MPB as I find them fantastic and the gear is always as listed. Last generation’s high-end camera is often better than this generation’s entry-level model, and much cheaper. Rent before you buy – it’s a great way to test equipment before committing. And remember, great photos come from the photographer, not the gear. I’ve seen breathtaking images taken with smartphones and entry-level cameras.
Ultimately, choose gear that fits your needs and budget. Don’t fall into the trap of thinking you need the latest and greatest to take good photos. Focus on learning your craft, understanding light and composition. The gear is just a tool – you’re the artist. And as you grow and evolve as a photographer, your gear needs will too. Enjoy the journey!